Generic Agent
Processing tickets requires often a workflow. Let’s say “if-then” activities.
If specific conditions match like:
A ticket is from one particular customer.
A ticket is assigned to an appropriate queue.
A ticket has a defined priority.
A ticket contains defined keywords.
Outlined activities must be performed like changing the ticket priority, moving the ticket to another group, assigning a service to a ticket, and many more.
Also time-based activities can be required like cleaning up the spam-queue once a week.
Rexpondo supports this with the Generic Agent. Here, simple or compound time and event-based tasks are configurable in the Rexpondo front end without the requirement to learn a scripting language. Depending on search criteria, and time or event criteria, tickets will automatically be acted upon.
Use this screen to manage generic agent jobs in the system. A fresh Rexpondo installation contains no generic agent jobs by default. The generic agent job management screen is available in the Generic Agent module of the Processes & Automation group.
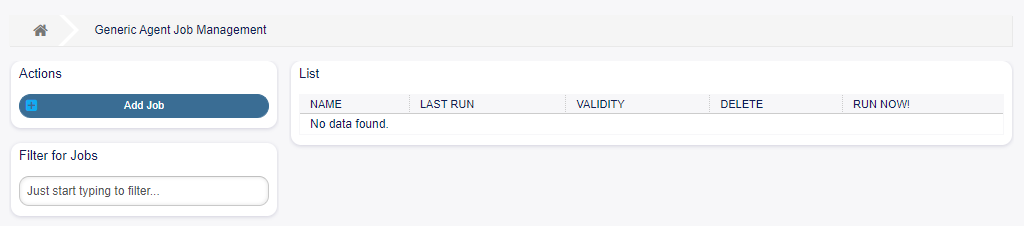
Generic Agent Management Screen
Manage Generic Agent Jobs
To create a new generic agent job:
Click on the Add Job button in the left sidebar.
Fill in the required fields.
Click on the Save button.
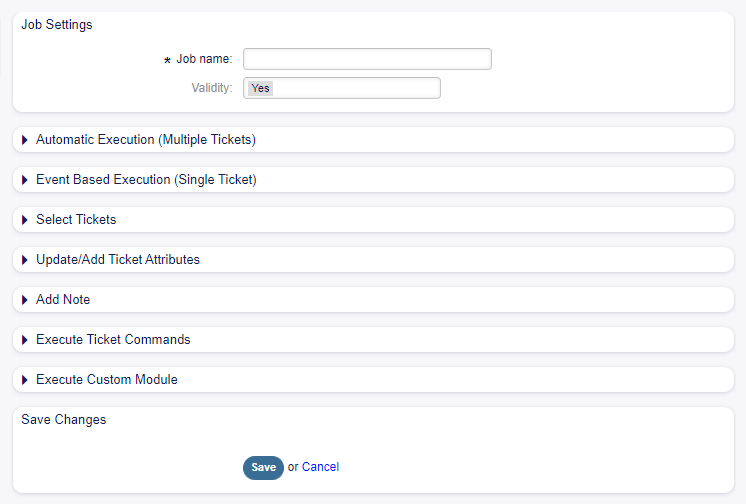
Create New Generic Agent Job Screen
To edit a generic agent job:
Click on a generic agent job in the list of generic agent jobs.
Modify the fields.
Click on the Save or Save and finish button.
Edit Generic Agent Job Screen
To delete a generic agent job:
Click on the trash icon in the fourth column of the overview table.
Click on the Confirm button.

Delete Generic Agent Job Screen
Note
If several generic agent jobs are added to the system, use the filter box to find a particular generic agent job by just typing the name to filter.
Generic Agent Job Settings
The following settings are available when adding or editing this resource. The fields marked with an asterisk are mandatory.
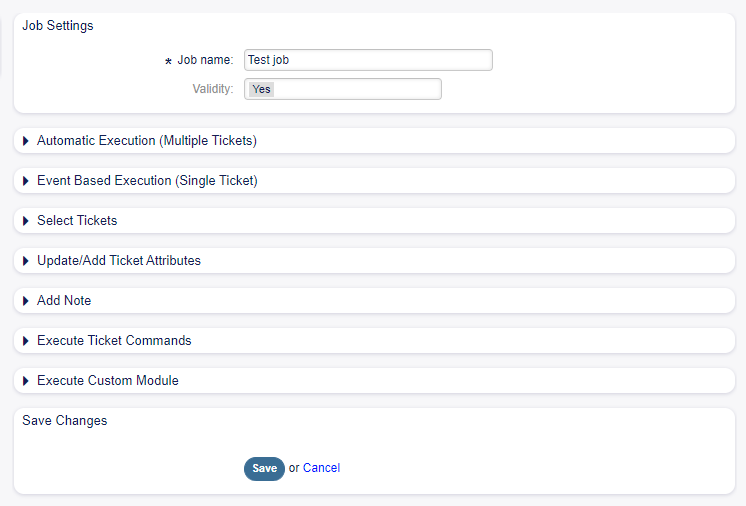
General Job Settings

Job Settings - General
- Job Name *
The name of this resource. Any type of characters can be entered to this field including uppercase letters and spaces. The name will be displayed in the overview table.
- Validity
Set the validity of this resource. This resource can be used in Rexpondo only, if this field is set to Yes. Setting this field to No will disable the use of the resource.
Automatic Execution
Fill in this section to set the times for automatic execution of the job.
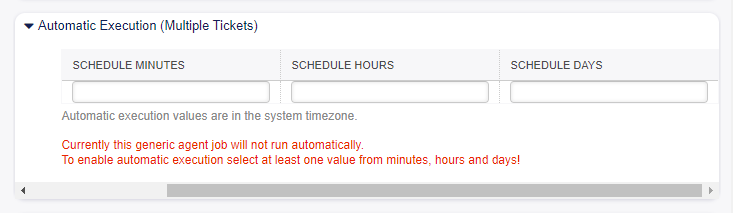
Job Settings - Automatic Execution
- Schedule minutes
Select the minutes in which the job has to be executed. For example if 10 is selected, the job will be executed in every hour in 00:10, 01:10, 02:10, etc.
- Schedule hours
Select the hours in which the job has to be executed. For example if 10 is selected for minutes and 02 is selected for hours, the job will be executed in every day in 02:10.
- Schedule days
Select the days in which the job has to be executed. For example if 10 is selected for minutes, 02 is selected for hours and Fri is selected for days, the job will be executed in every week in Friday 02:10.
Event Based Execution
Fill in this section to set events that trigger the execution of the job.
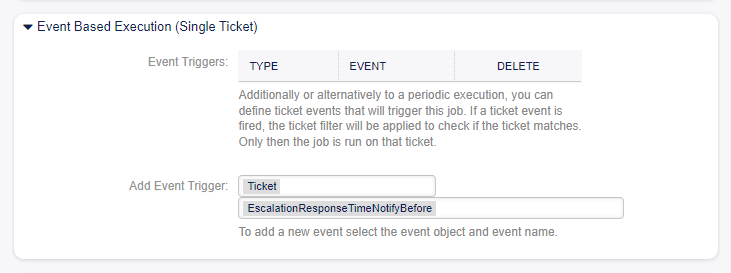
Job Settings - Event Based Execution
- Event Triggers
This is a list of already added events. If no events are added yet, the list contains no elements. Elements can be deleted by clicking on the trash icon in the last column.
- Add Event Trigger
Select an object and a related event that will trigger the job.
Select Tickets
This section contains all the attributes, that you can use to select the affected tickets.
Fields are self-explained, so there is no additional explanation here.
Update/Add Ticket Attributes
Fill in this section to update and/or add ticket attributes.
Fields are self-explained, so there is no additional explanation here.
Add Note
Fill in this section to add a note to tickets that are affected by job execution.
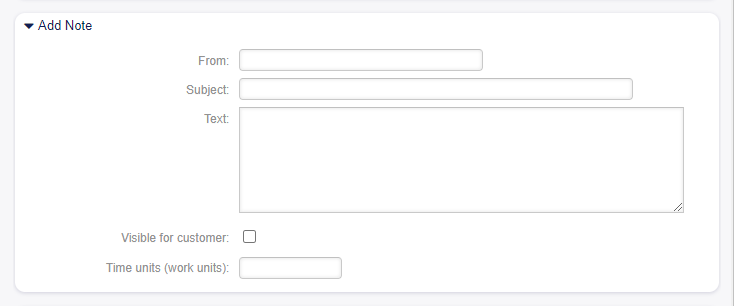
Job Settings - Add Note
Execute Ticket Commands
Fill in this section, if you would like to make execute a custom command with the job.
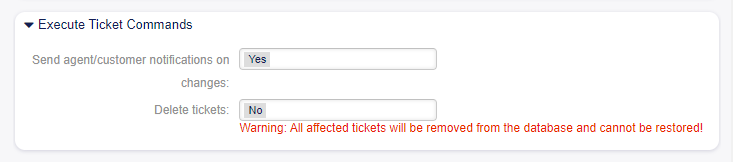
Job Settings - Execute Ticket Commands
- Send agent/customer notifications on changes
If Yes is selected, a notification will be sent to agents and customers about ticket changes.
- Delete tickets
If Yes is selected, the generic agent job will delete the matched tickets.
Warning
All affected tickets will be removed from the database and cannot be restored!
Execute Custom Module
Fill in this section, if you would like to make execute a custom module with the job.

Job Settings - Execute Custom Module
- Module
This is the path for the module to be executed.
Note
Use
::as directory separator, if the value contains a path.- Param key
Enter the key of the parameter, that should be passed to the module.
- Param value
Enter the value of the parameter, that should be passed to the module.
Import/Export Generic Agents
From the Generic Agent overview screen you can import/export generic agents onto your system.
The file must be in .yml format as exported from the Generic Agent module.
When importing, there may be ID inconsistencies in the configurations of the individual generic agents, due to a possible difference between the export and import systems.
In the presence of these inconsistencies, the individual generic agents must be manually modified.
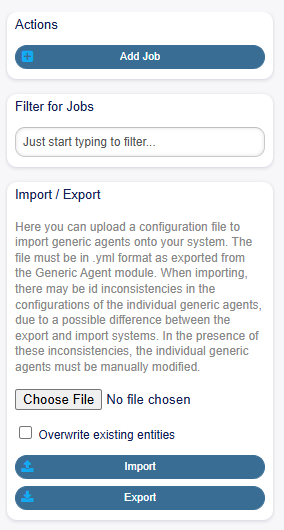
Import/Export Functionality
Note
If the Overwrite existing entities option is checked and you’re importing a generic agent with the same name as one already configured, this will get overwritten with the newly imported one.